Set up and manage discount codes
This guide walks you through creating discount codes for your events - a great way to attract attendees and boost ticket sales by offering special pricing to selected groups. It covers all essential steps, from setting up a code to customizing its validity period and usage limits.
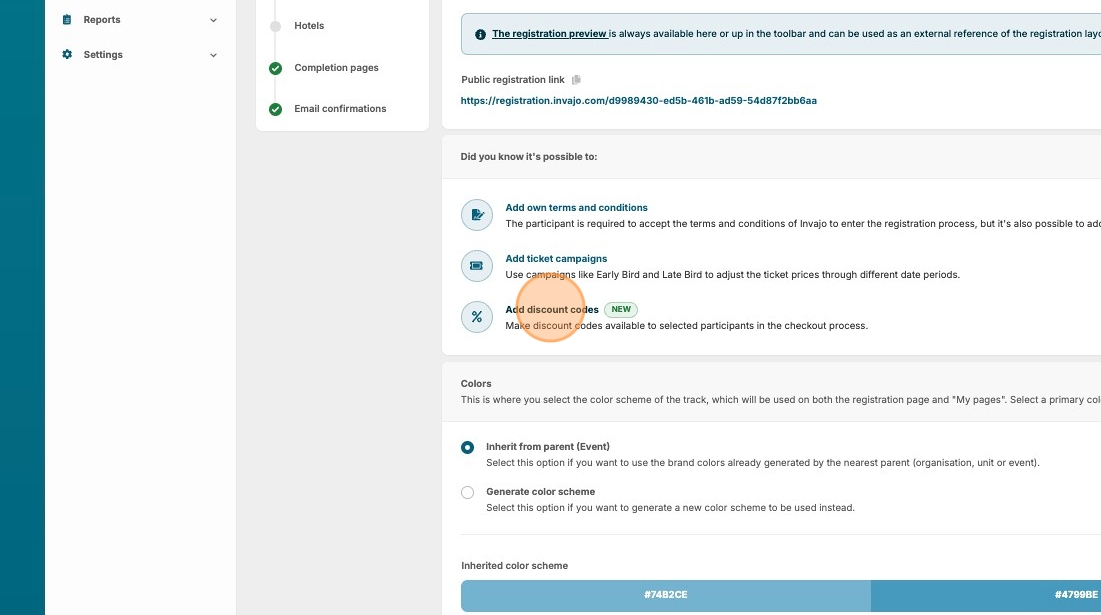
1. Navigate to "Registration" → "Tracks" → "Settings"

2. Use the shortcut by clicking "Add discount codes". You can also access these settings through the left-side menu. Please view step 21 for more information.
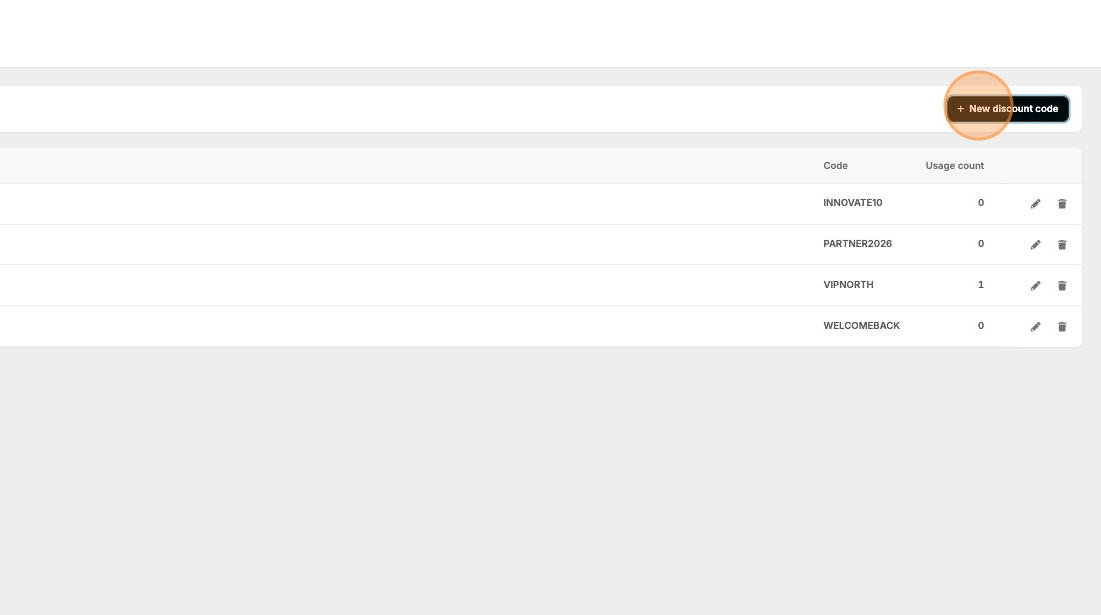
3. Click "New discount code"
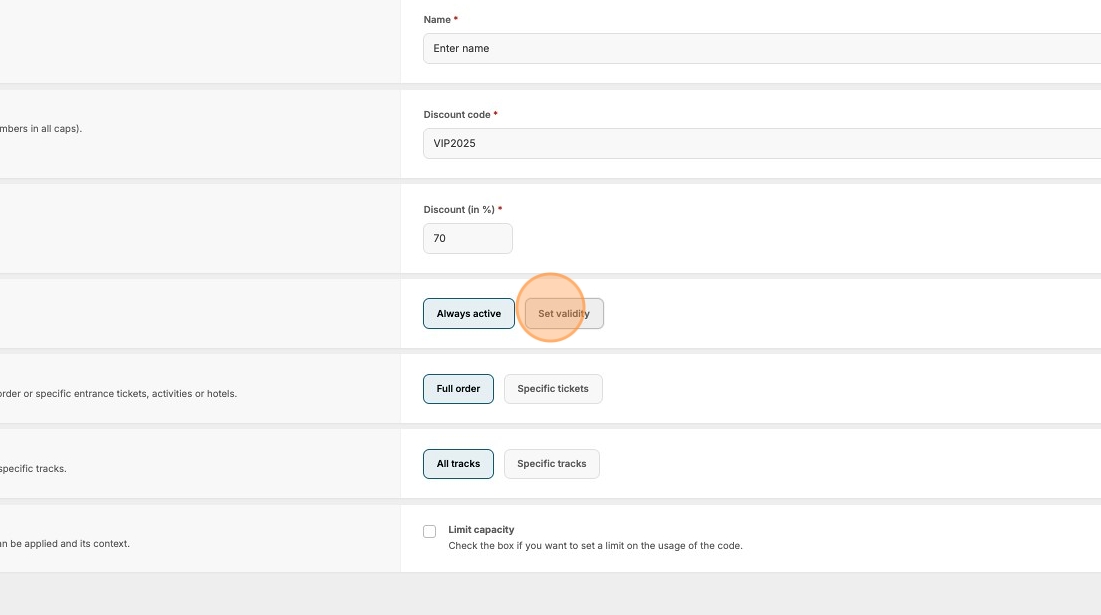
4. Give your code a name to keep track of it.
5. Click the "Discount code" field.
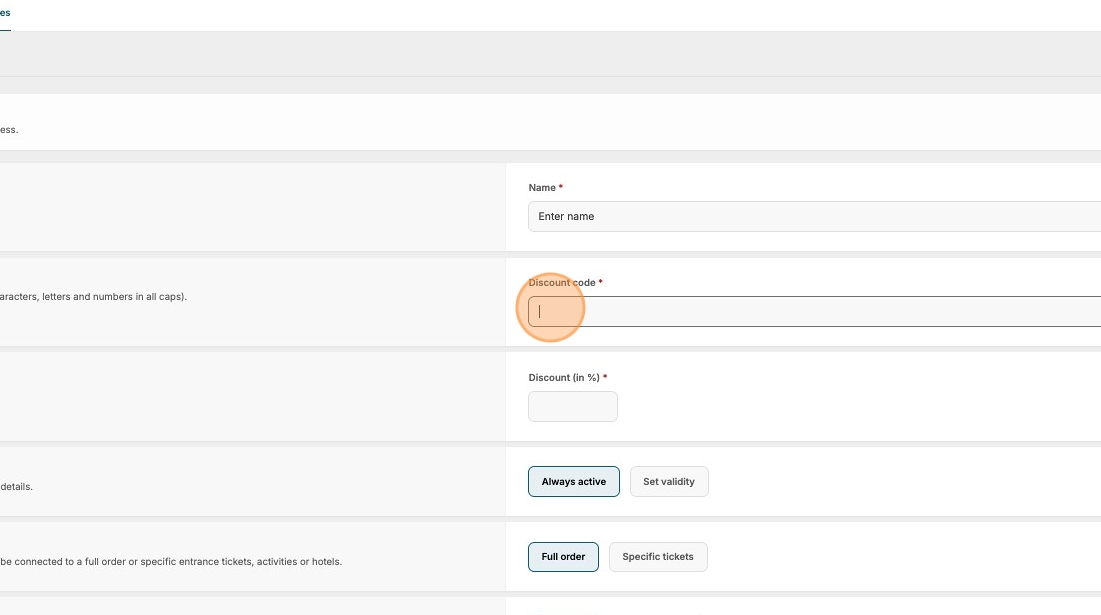
6. Add a discount code, for example, "VIP2025"
7. Click the "Discount (in %) *" field.
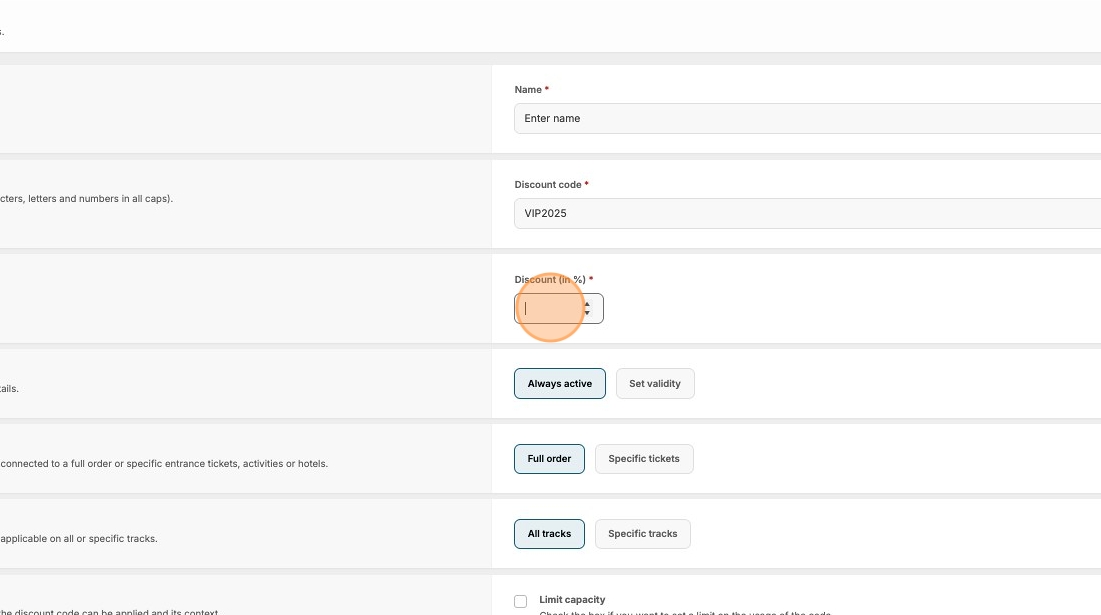
8. Type your value.
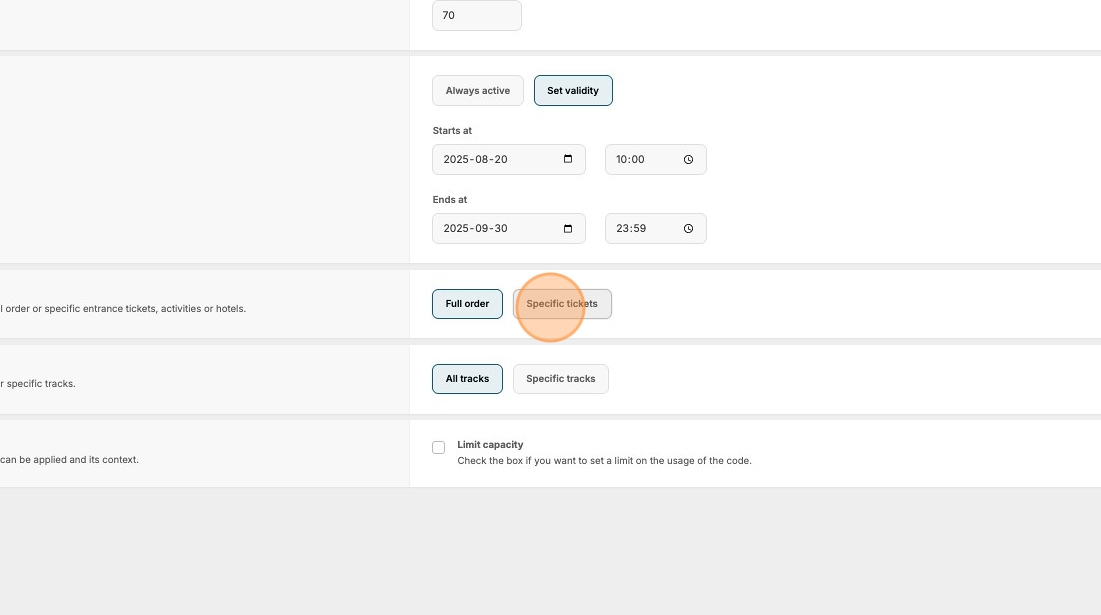
9. Click here if you want to set a validity period for the discount code.
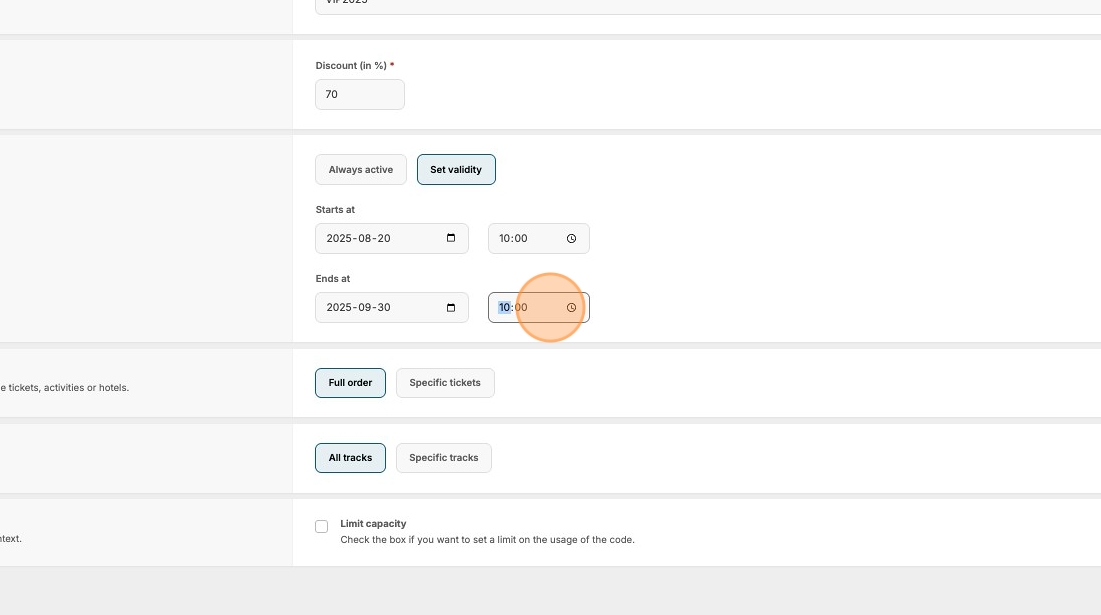
10. Click the "Starts at" field to choose when the code becomes valid.
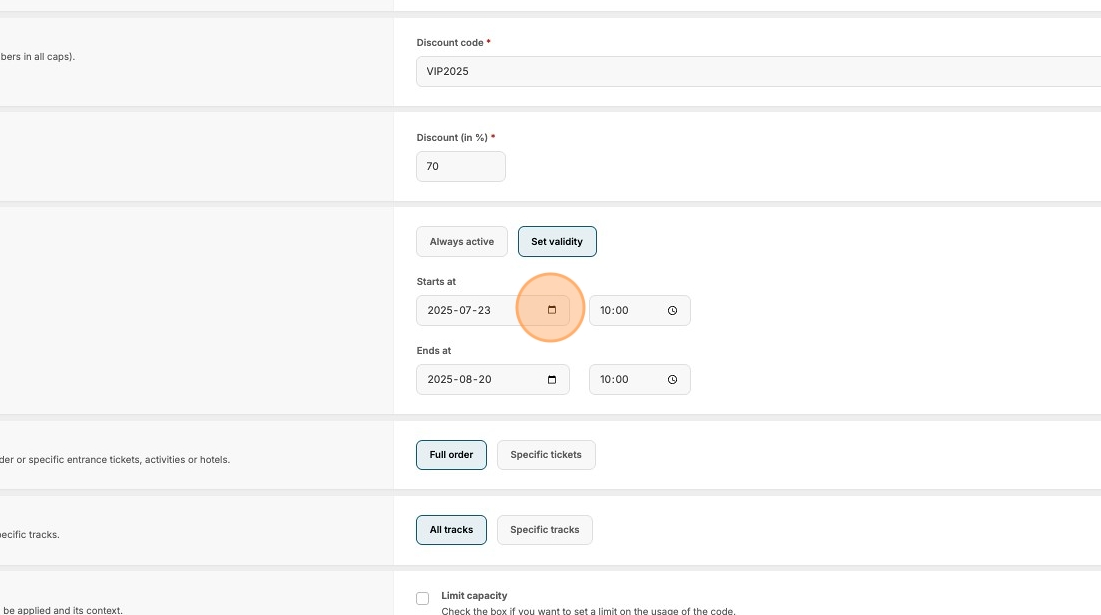
11. Click the "Ends at" field to set the end date for the discount code.
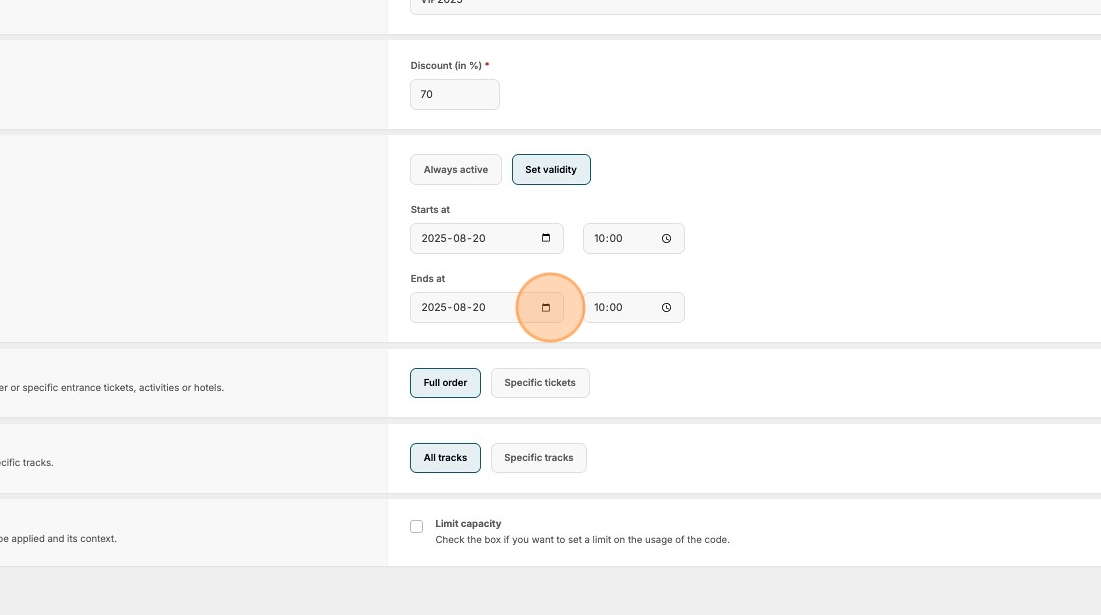
12. Click the time fields to refine the start and end to a specific time.
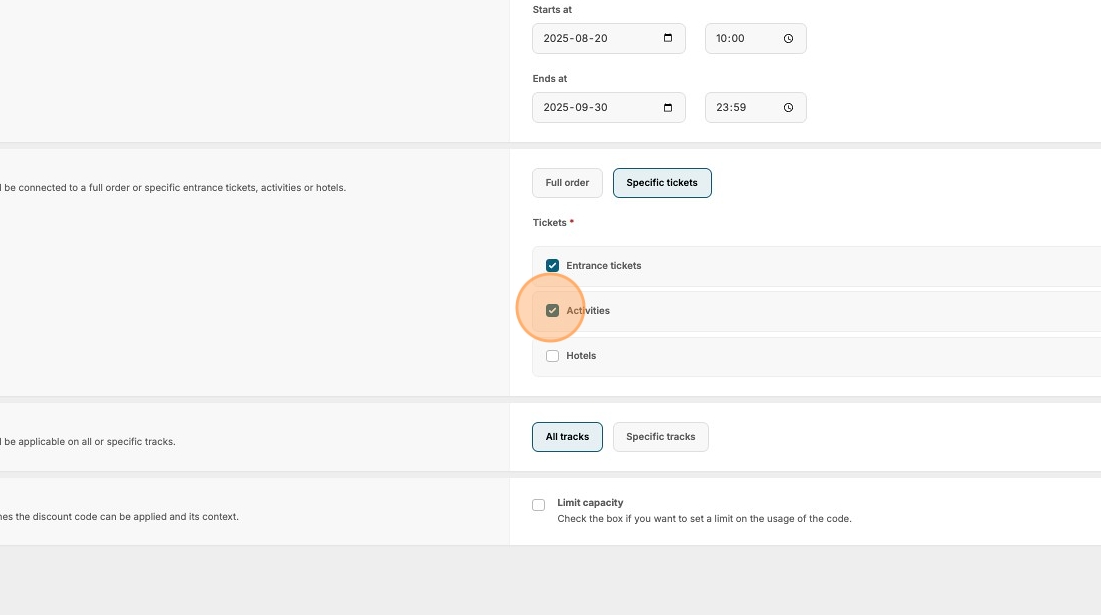
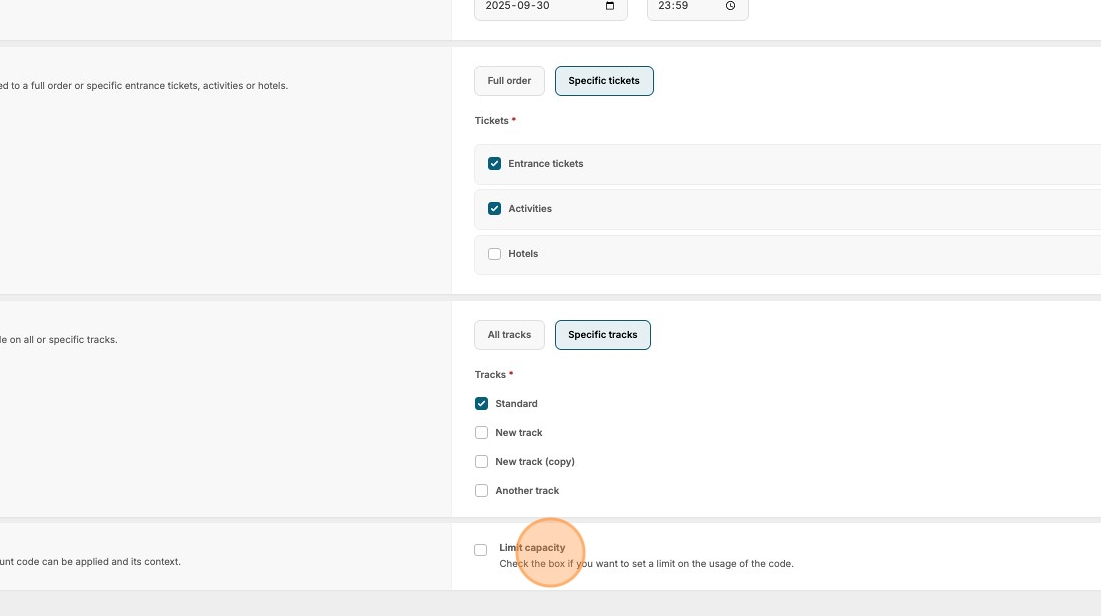
13. Click here if you only want the discount code to be valid for specific tickets.
14. Choose which ticket or tickets it should affect.
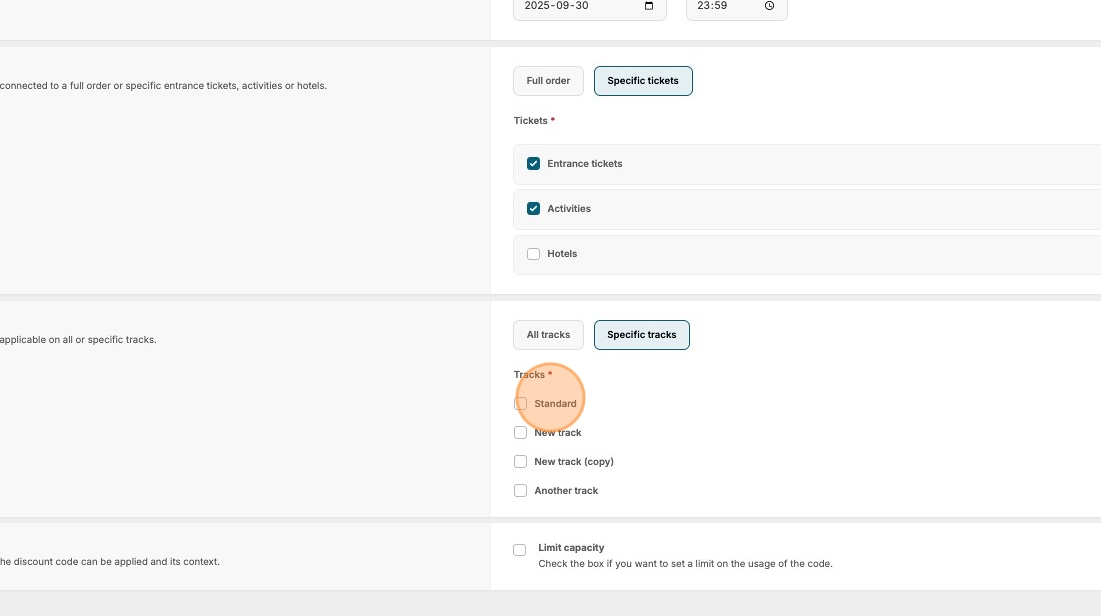
15. Click "Specific tracks" if you only want the discount code to affect specific tracks.
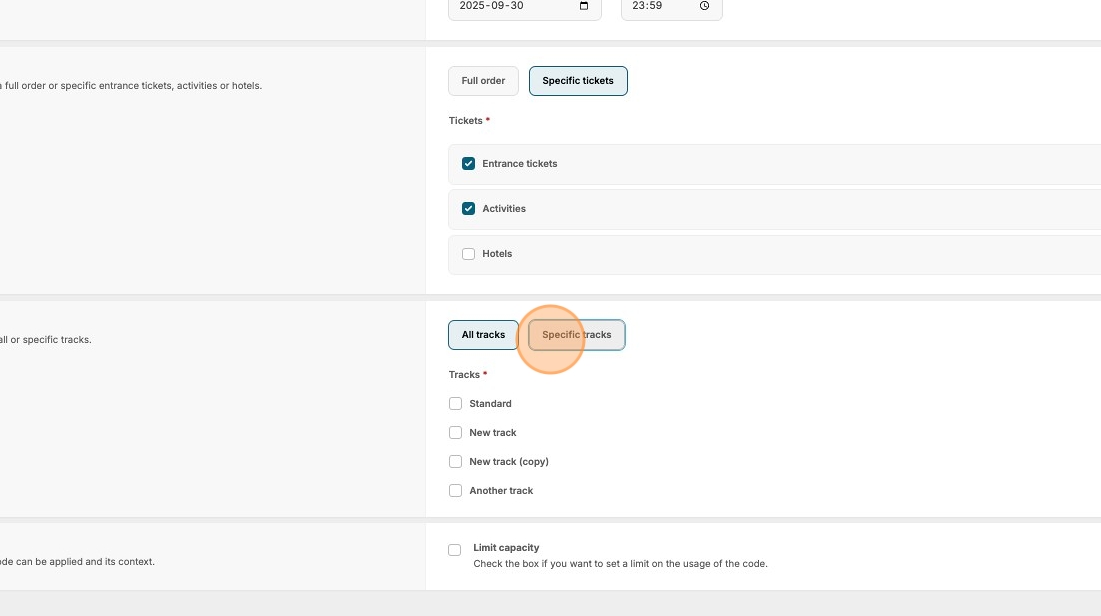
16. Click here.
17. Click here if you want to limit how many times the code can be used.
18. Click the "Number of uses " field.
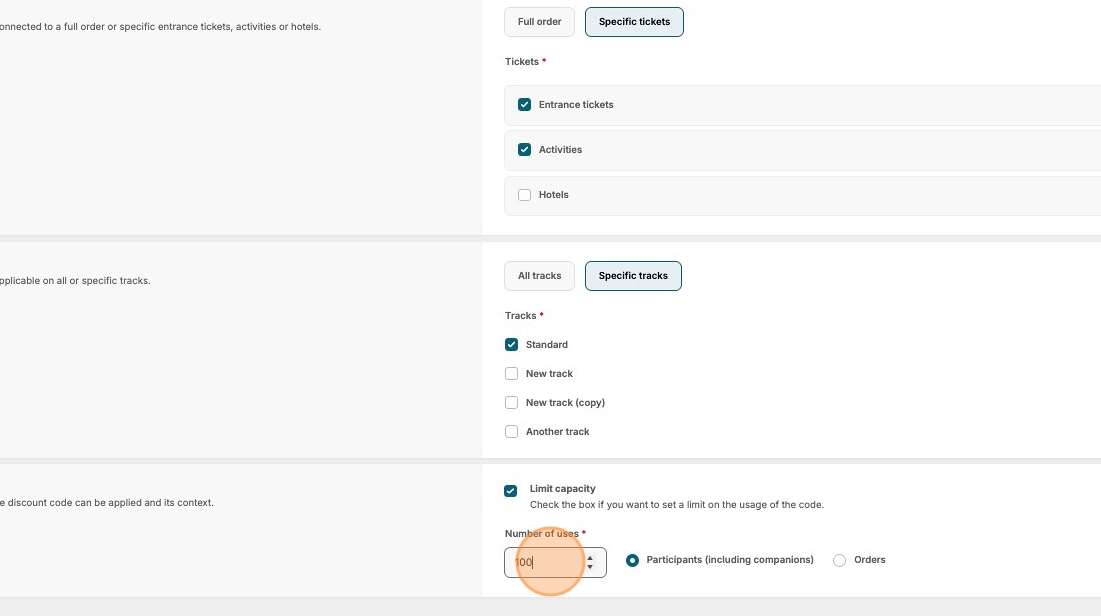
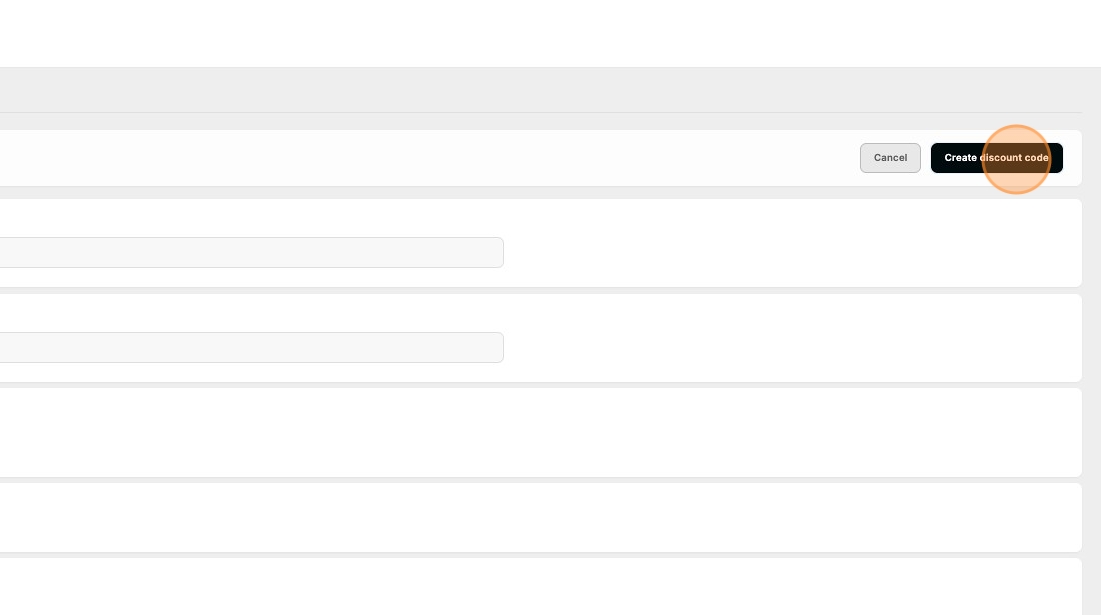
19. Type your value.
20. Click "Create discount code" to save.
21. You can access the discount code settings at any time via the left-side menu by navigating to "Settings" → "Registration" → "Discount codes"

